
Yard Prep Checklist Before a Concrete Slab Pour (Don’t Skip Step 1)
Most of the work that determines whether a concrete slab lasts 40 years or cracks within five happens before the concrete truck ever shows up. Site prep isn’t the exciting part of a DIY slab project, but it’s the part that actually controls the outcome — the pour itself is almost the easy step by comparison. Here’s the sequence, in order, and why each step matters.
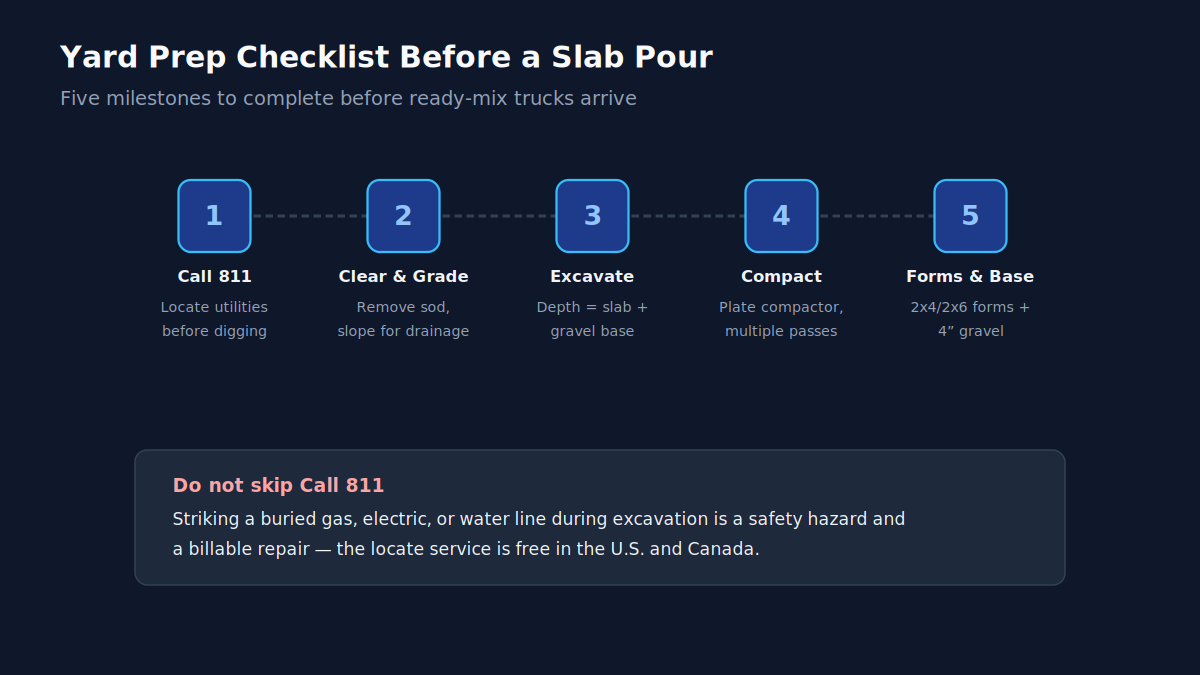
Step 1: Call 811 Before You Dig — No Exceptions
This is the one step on this list that isn’t optional or negotiable. In the U.S. and Canada, calling 811 (or submitting a request through your local one-call center) gets buried utility lines — gas, electric, water, communications — marked on your property, free of charge, typically within 3 to 10 business days depending on your state. Striking a buried line while excavating isn’t just expensive to repair; it’s a genuine safety hazard, and in most states it’s also a legal requirement to call before you dig, with real penalties for skipping it. Build this into your schedule early since the notice period can be the longest single wait in the entire prep sequence.
Step 2: Clear and Grade the Site
Remove sod, topsoil, roots, and any organic material from the footprint — organic matter decomposes over time, leaving voids that cause settlement cracking under the slab later (see our guide to crack causes for how that specific failure mode develops). While you’re at it, establish the finished grade: slope the area slightly, typically 1/8 inch to 1/4 inch of fall per linear foot, away from your house or any other structure, so the finished slab sheds water in the right direction instead of directing it toward a foundation.
Step 3: Excavate to the Right Depth
Total excavation depth needs to account for both the slab thickness and the gravel base underneath it — for a standard 4-inch patio slab on a 4-inch gravel base, that’s 8 inches of total excavation. Check our guide on how thick your slab should be for the right thickness by application (patios, driveways, and garage floors all have different standards) before finalizing your excavation depth, and use the volume calculator to confirm your concrete order once the footprint and thickness are set.
Step 4: Compact the Subgrade
This is the step people skip most often, and it’s the one most directly responsible for settlement cracking down the line. Run a plate compactor over the bare excavated soil in multiple passes before adding any gravel — compacting the native soil first, then compacting the gravel base in its own lifts, gives you a genuinely stable foundation instead of a slab poured over loose, uneven ground that will settle unevenly under load. If you’re working with expansive clay soil or an area with obviously soft or wet spots, this step deserves extra attention (and potentially extra excavation depth to remove and replace the worst material) since it’s much cheaper to fix a bad sub-base now than to repair a cracked slab later.
Step 5: Set Forms and Install the Gravel Base
With the subgrade compacted, install your gravel base — typically 4 inches of compacted crushed stone (#57 or similar) for a standard residential slab, sized with our gravel base calculator, which accounts for the roughly 15% compaction factor between loose and compacted volume. Set your formwork (2×4 lumber for a 4-inch slab, 2×6 for 5–6 inches) square and level, staked securely every 3 feet or so — concrete is heavy and exerts real outward pressure on forms while it’s still wet, so under-built formwork is a common cause of a bulged or uneven slab edge.
Don’t Forget: Vapor Barrier and Reinforcement
Once forms and gravel base are in, most residential slabs also get a 10–15 mil polyethylene vapor barrier (especially important for any slab that will have flooring installed over it later) and reinforcement — rebar or wire mesh, sized with our rebar calculator — placed on chairs so it sits centered within the slab depth rather than resting on the ground where it does nothing useful. These go in after base compaction but before the pour itself, so budget time for this step in your schedule rather than treating it as an afterthought.
Tools You’ll Actually Need
A realistic DIY prep tool list: a shovel and mattock or a rented mini-excavator for larger footprints, a wheelbarrow for spoil removal, a plate compactor (rentable by the day from most equipment rental yards, and genuinely not worth skipping in favor of hand-tamping), a 4-foot level or laser level for checking grade and form height, a string line and stakes for establishing straight edges before excavation begins, and a hand tamper for tight corners a plate compactor can’t reach. For anything larger than a small patio, renting a compactor for the day is inexpensive relative to the cost of a settlement crack repair down the line — this is not a step worth improvising with a hand tamper alone on a driveway-sized project.
Checking Your Work Before the Truck Arrives
Before you schedule your ready-mix delivery or start mixing bagged concrete, do a final walkthrough: confirm forms are square (measure both diagonals — they should be equal — rather than just trusting the corners look right), confirm the gravel base is uniformly compacted with no soft spots when you walk across it, confirm reinforcement is properly elevated on chairs and not resting on the vapor barrier or bare gravel, and confirm you have a clear, safe path for the concrete truck or wheelbarrows to actually reach the forms. This final check takes twenty minutes and catches the kind of mistake that’s expensive to fix once concrete is already in the forms.
A Realistic Timeline
| Task | Typical Time (DIY, average patio-sized slab) |
|---|---|
| 811 utility locate wait | 3–10 business days (schedule this first) |
| Clearing and grading | Half a day to a full day |
| Excavation | 1–2 days, depending on soil and equipment |
| Subgrade compaction | Half a day |
| Forms, gravel base, vapor barrier, rebar | 1–2 days |
A weather-flexible schedule matters here too — see our guide on the best time of year to pour for how temperature and rain affect not just the pour day but the whole prep window leading up to it.
Weather and Prep Timing
Site prep work is more weather-tolerant than the pour itself — you can excavate and compact on a cool or overcast day without the same concerns that apply to placing and finishing concrete. But avoid doing your final grading and compaction right before a heavy rain, since a saturated sub-base compacts poorly and may need to dry out and be re-compacted before you can safely move to forms and pour. If your prep work and your pour date are separated by more than a few days, do a quick recheck of the compacted subgrade right before the pour — rain, foot traffic, or a curious pet can disturb a freshly compacted surface more than you’d expect.
Common Prep Mistakes That Cause Problems Later
- Skipping compaction to save time. This is the single most common cause of preventable settlement cracking, and it’s invisible until the slab has already cracked.
- Wrong slope direction. Grading the site to slope toward the house instead of away from it is a mistake that’s expensive to fix after the pour — double-check with a level or string line before excavating.
- Under-sized gravel base. Skimping on base depth to save on material cost reduces drainage and load distribution, which shows up as cracking or settling within the first few years.
- Loose or under-staked forms. A form that bulges during the pour is difficult to fix once concrete is in it — check form rigidity before the truck arrives, not during the pour.
The Bottom Line
None of these five steps are difficult individually, but skipping any one of them is how an otherwise well-built slab develops problems it didn’t need to have. If you only take one thing away from this checklist, make it this: the pour itself is a single afternoon, but a poorly prepared sub-base is a problem that lives under your slab for the rest of its life. Get the prep right and the concrete work that follows — sized correctly with our concrete slab cost calculator — has every chance of lasting the 30-plus years a properly built slab is capable of.
Frequently Asked Questions
Do I really need to call 811 for a small backyard project?
Yes — utility depth isn’t always what you’d expect, and shallow buried lines exist even in areas that seem unlikely to have them. The locate service is free and the alternative (striking a line) is not.
How do I know if my soil needs extra compaction work?
Soft, spongy areas, visible standing water after rain, or heavy clay that stays sticky when wet are all signs the subgrade may need extra attention — additional excavation and replacement with compactable fill, or professional soil evaluation for a larger project.
Can I skip the gravel base on a small slab?
It’s not recommended even for small slabs — the base provides drainage and load distribution regardless of slab size, and the material cost is relatively minor compared to the risk of settlement or moisture issues without it.
Calculate Your Concrete Project Budget
Use our comprehensive concrete slab cost calculator to get a complete line-item breakdown of materials, labor, reinforcement, and base preparation.
Launch Concrete Slab Calculator →